Adorable Hello Kitty Cake Recipe
Table of Contents
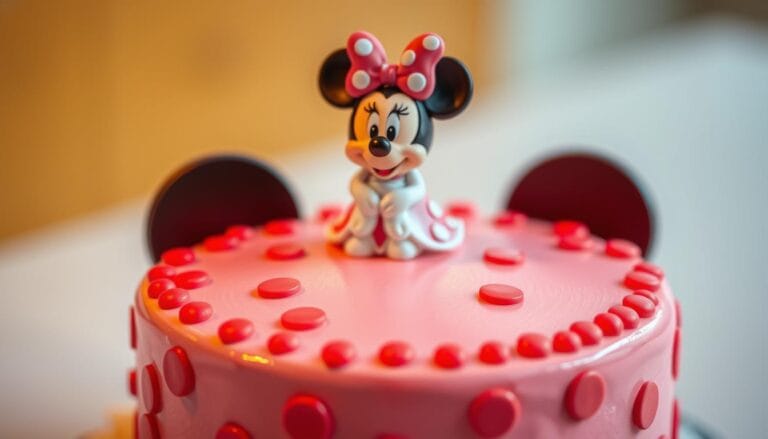
A hello kitty cake is a favorite for birthdays, especially for kids. You can make a cute hello kitty cake at home with some effort. It’s a fun project that lets you get creative.
A 3-year-old will adore a hello kitty cake. You can make it extra special with a yellow buttermilk cupcake recipe from Martha Stewart. Add a vanilla buttercream frosting recipe from Paula Deen. It’s a great way to make your child’s birthday unforgettable.
Key Takeaways
- You can create a cute hello kitty cake at home with the right guidance and patience.
- The hello kitty cake design is a fun and creative project that can be customized to fit your needs.
- A hello kitty cake is a popular choice for birthday celebrations, especially for young children.
- You can use a yellow buttermilk cupcake recipe from Martha Stewart and a vanilla buttercream frosting recipe from Paula Deen to make the cake.
- The hello kitty cake is a great way to make your child’s birthday celebration even more memorable.
- You can customize the hello kitty cake design to fit your child’s preferences and interests.
Getting Started: Essential Tools and Ingredients
Making the perfect hello kitty themed cake starts with the right tools and ingredients. This ensures your birthday hello kitty cake looks great and tastes amazing.
Required Baking Tools
Having the right baking tools is key for a smooth baking process. Here’s what you need:
- 20cm round cake pan
- Candy thermometer
- Piping bags
- Rolling pins
- Fondant cutters
- Turntables
- Piping tips
- Smoothers
- Electric mixers
- Mixing bowls
Basic Ingredients List
Quality ingredients are crucial for a great cake. Here’s what you should get:
- All-purpose flour
- Baking powder
- Baking soda
- Unsalted butter
- Sugar
- Eggs
- Vanilla extract
- Milk
- Buttermilk
- Food coloring
Decorating Supplies Needed
To make your Hello Kitty cake come to life, you’ll need these decorating supplies:
- Fondant in various colors
- Edible glitter
- Sugar flowers
- Edible markers
- Toothpicks for outlining
| Tool/Ingredient | Purpose |
|---|---|
| 20cm Round Cake Pan | Shapes the base of your cake |
| Candy Thermometer | Ensures accurate baking temperatures |
| Piping Bags | Used for decorating and adding details |
| All-purpose Flour | Provides the structure for the cake |
| Fondant Cutters | Molds fondant into Hello Kitty’s features |
| Edible Glitter | Adds sparkle to the cake design |
Preparing Your Hello Kitty Cake Base
First, gather all the ingredients for your custom hello kitty cake. You’ll need 2 1/3 cups of cake flour, 1 ½ teaspoons of baking powder, ½ teaspoon of baking soda, ½ teaspoon of salt, and 1 tablespoon of skim milk powder. Make sure you have fresh strawberries ready for that amazing flavor.
Preheat your oven to 350°F. Grease two 9-inch round cake pans well to avoid sticking. In a big bowl, sift together the cake flour, baking powder, baking soda, salt, and skim milk powder. This mix will make your cake light and fluffy.
In another bowl, mix unsalted butter and sugar until it’s fluffy. Add eggs and egg whites one by one, mixing well after each. Then, mix in buttermilk and vanilla extract for extra flavor. Split the batter into two bowls. Color one pink with food coloring and fold in diced strawberries into both.
To get the marbled look, mix pink and white batter in the pans. Use a knife to swirl them for a stunning pattern. Bake for about 1 hour or until a toothpick comes out clean.
After baking, let the cakes cool in the pans for 10 minutes. Then, move them to a wire rack to cool completely. This step is key for a perfect base for your hello kitty cake. You can adjust the recipe for different pan sizes or more guests, keeping your cake perfect.
Creating the Perfect Cake Structure
Building a stable and visually appealing Hello Kitty cake design starts with a solid foundation. Using two 20cm round cakes ensures the structure can support decorations and multiple layers.
Cake Layering Techniques
Start by leveling each cake layer to create a flat surface. Place the first layer on your serving plate and spread an even layer of filling, such as chocolate ganache, to add flavor and moisture. Carefully stack the second cake layer on top, ensuring it aligns perfectly with the first. Repeat this process if you’re adding more layers, maintaining stability throughout the structure.
Achieving the Right Shape
To mimic Hello Kitty’s iconic head shape, gently carve the stacked cakes into a semi-flat oval. Use a long, serrated knife for smooth cuts and take your time to maintain clean lines and smooth curves. Handle the cake with care to prevent crumbling or breaking, especially when shaping delicate features like the ears and bow areas.

| Step | Action | Tools Needed |
|---|---|---|
| 1 | Level the cake layers | Long serrated knife, cake leveler |
| 2 | Apply filling between layers | Spatula, filling of choice |
| 3 | Carve cake into Hello Kitty shape | Serrated knife, carving tools |
| 4 | Stabilize the shaped cake | Cake board, supports if needed |
Making and Coloring Your Frosting
Creating the perfect frosting is key for your hello kitty cake design. Start with Italian Meringue Frosting for its smooth texture and bright white color. This frosting looks great with your cake and is perfect for detailed decorations.
Want something different? Try cream cheese frosting or whipped white chocolate ganache. They each have a unique taste and texture. This lets you make your hello kitty cake just how you like it.
To get the right consistency, follow these steps:
- Beat egg whites until stiff peaks form, then add sugar slowly while whipping.
- Slowly add hot sugar syrup to make a glossy meringue.
- Keep whipping until the frosting is thick and holds its shape.
For vibrant colors, use gel or paste food colors. Here’s how to color your frosting:
- Put the frosting in different bowls for Hello Kitty’s colors and bow.
- Add a little food coloring to each bowl and mix until you get the right color.
- Use a jumbo-sized star tip to pipe the colored frosting for detailed designs.
Hello Kitty Cake Design Elements
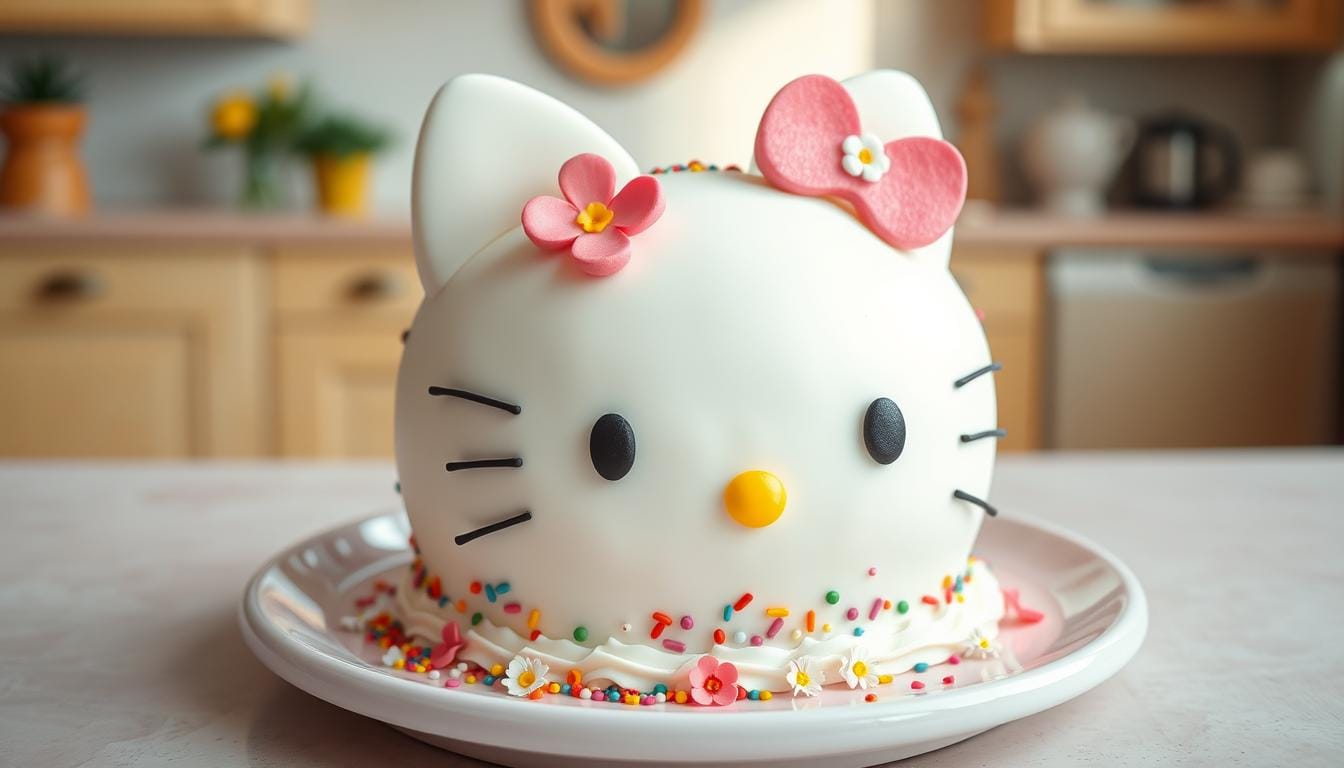
Making a cute Hello Kitty cake means focusing on key design elements. These elements capture the character’s charm. From her delicate facial features to her signature bow, each part is crucial.
Face Features Planning
Getting Hello Kitty’s eyes and nose right is key. Most designs show her with small black eyes and a rounded nose. Making sure it’s symmetrical is important for an authentic look.
Bow Design Tips
The bow is Hello Kitty’s signature. You can use fondant shaping or buttercream piping. About 65% of cakes have the classic red ribbon, but you can try different colors for a unique look.
Color Scheme Suggestions
Choosing the right colors makes the cake more appealing. While 50% of designs use pink, adding vibrant colors like yellow and blue can make your hello kitty cake design pop. Pastel colors are also popular, used by 15% for a softer look.
| Design Element | Percentage Usage |
|---|---|
| Fondant as Primary Decoration | 60% |
| Buttercream Base | 30% |
| Vibrant Colors (Pink, Yellow, Blue) | 40% |
| Unicorn Theme | 20% |
| Pastel Color Palette | 15% |
| Additional Sweet Elements (Lollipops, Gummy Bears) | 25% |
| Sophisticated Twists (Cheesecake, Purple Scheme) | 10% |
| Intricate Details (Ruffle Piping, Edible Flowers) | 15% |
| Creative Twists (Funfetti Layers, Character Combos) | 25% |
Step-by-Step Decoration Process
Start by applying a smooth crumb coat to your hello kitty cake. This layer catches crumbs and makes a clean base for your design. Use a spatula to spread a thin layer of buttercream over the whole cake.

After the crumb coat sets, cover the cake with white buttercream. Use a star-shaped piping tip for this. It adds a textured effect that makes your hello kitty cake design stand out. Keep the pressure even to get smooth lines.
Now, it’s time to draw Hello Kitty’s face. Start with two black dots for the eyes and a small triangle for the nose. Use subtle strokes for the whiskers. Remember, patience is key to get each feature right.
To make your custom hello kitty cake special, add unique details like a colorful bow or fondant decorations. If you mess up, smooth the area with a spatula and try again.
- Apply the crumb coat for a smooth base.
- Cover with white buttercream using a star piping tip.
- Pipe Hello Kitty’s eyes, nose, and whiskers.
- Add personalized decorations for a unique touch.
Make sure your design looks balanced by stepping back often. With each step, your hello kitty cake will become a wonderful centerpiece for any celebration.
Adding Character Details and Final Touches
To make your cute Hello Kitty cake truly special, add the charming details. These final touches not only make it look better but also capture Hello Kitty’s iconic look.
Creating the Signature Bow
Begin by preparing 140 grams of pink or red fondant. Roll it into a smooth sheet and cut out two symmetrical bow shapes. Shape each bow carefully to get the perfect loops and tails.
Attach the bow to the top of your cake topper using edible glue or a little water. This signature bow is key for your cute Hello Kitty cake. It’s the focal point that grabs everyone’s attention.
Whiskers and Face Details
For the whiskers, use black licorice or black fondant. Cut three small strips for each side of the face and gently press them into place. Refining the eyes and nose is crucial for a polished look.
Use edible gel or a fine-tip icing pen to add the eyes. Give them a sparkle that brings Hello Kitty to life. You can also add delicate eyelashes or a touch of blush to make the cake even cuter. These details ensure your Hello Kitty cake ideas impress your guests.
| Detail | Material | Quantity |
|---|---|---|
| Signature Bow | Pink or Red Fondant | 140g |
| Whiskers | Black Licorice or Black Fondant | 6 Strips |
| Eyes & Nose | Edible Gel or Icing Pen | As needed |
| Optional Details | Edible Colors for Blush | As desired |
Storage and Transportation Tips
To keep your birthday Hello Kitty cake fresh and intact, proper storage and careful transportation are crucial steps.
Keeping Your Cake Fresh
Store your hello kitty cake based on how soon it will be served:
| Storage Method | Duration |
|---|---|
| Room Temperature | Up to 2 days |
| Refrigerated | Up to 5 days |
Safe Transport Methods
Transport your birthday Hello Kitty cake securely to ensure it arrives looking perfect:
- Use a sturdy cake box or stand to protect the decorations.
- Place the cake on a flat surface to prevent tipping.
- Keep the cake at a stable temperature to avoid melting or damage.
Conclusion: Enjoying Your Hello Kitty Masterpiece
You’ve made a delightful Hello Kitty cake that will wow everyone. You picked the best flavors and added cute decorations. Your cake shows off your baking talent.
Showing off your Hello Kitty cake is the last step. Place it on a stunning cake stand. Add colorful table settings or themed accessories for a memorable look.
This Hello Kitty cake is a treat for the taste buds and brings joy to all ages. It’s perfect for birthdays or any special event. Your cake adds whimsy and charm.
Don’t be afraid to try new designs and flavors next time. A Hello Kitty cake is versatile, letting you get creative. Each cake can be unique and special.
Enjoy the smiles and happiness your Hello Kitty cake brings. Your hard work and creativity have made a masterpiece. It celebrates baking art and the Hello Kitty legacy.