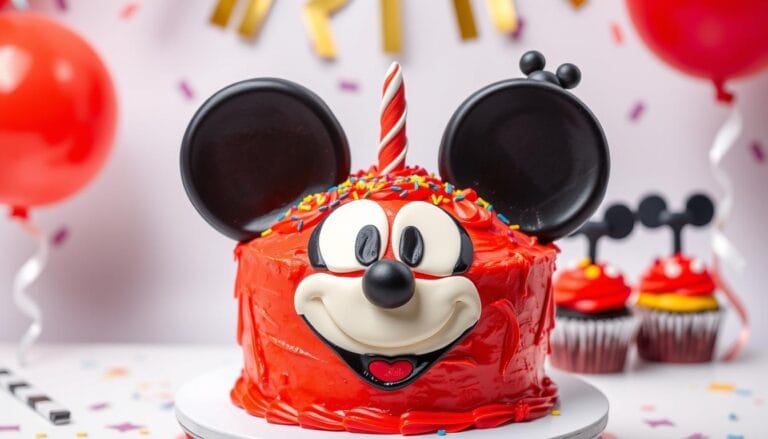
Bake a Magical Minnie Mouse Cake for Your Celebrations
Making a Minnie Mouse cake adds Disney magic to your birthday. It’s perfect for any party, big or small. You can pick from vanilla, chocolate, or red velvet cake. Decorate it with Minnie designs, toppers, or try Minnie-themed cupcakes or cake pops.
Teamania, a famous bakery in Rockville, has been making Minnie Mouse cakes since June 2019. They offer many choices, like classic Minnie designs and matching desserts. They focus on quality and making your celebration special with a tasty Minnie Mouse cake.
Table of Contents
Key Takeaways
- You can create a magical Minnie Mouse cake for your birthday celebrations with various customization options.
- Teamania offers personalized birthday cakes, including Minnie Mouse cakes, with a range of flavors and designs.
- A Minnie Mouse cake can be a great way to add a touch of Disney magic to your party.
- You can choose from various cake flavors, such as vanilla, chocolate, or red velvet.
- Customization options include classic Minnie design, edible toppers, and matching dessert ideas like Minnie-themed cupcakes or cake pops.
- Teamania’s emphasis on quality and stress-free process ensures a delicious and beautiful Minnie Mouse cake for your celebration.
- A Minnie Mouse cake is perfect for a Disney theme birthday party, and you can make it extra special with custom details like names and messages.
Why Choose a Minnie Mouse Cake for Your Special Event
Minnie Mouse cakes are perfect for any special event. They bring joy and excitement to any celebration. Whether it’s a birthday, wedding, or party, a Minnie Mouse cake is a great choice.
These cakes are not just delicious. They also add a touch of magic to your event. The adorable Minnie Mouse design makes everyone smile. It’s a fun way to celebrate with friends and family.
Essential Tools and Ingredients for Your Cake
To make a stunning Minnie Mouse cake, you need the right tools and ingredients. Fresh, high-quality ingredients make your cake taste great and look good. You’ll need mixing bowls, measuring cups, and a mixer for baking.
For ingredients, get flour, sugar, and butter. These are key for a tasty cake.
For baking tools, get a few important items. These include:
- Light-colored cake pans
- Cooling racks
- Parchment paper
- Offset spatulas
- Rubber spatulas
These tools help make your cake look like a pro made it. For a Minnie Mouse cake, use pink and white ingredients. This gives your cake a special color.
A Minnie Mouse cake feeds over 25 people. To make it delicious and pretty, use top-notch ingredients and tools. With the right stuff, your cake will wow your guests.
Think about using themed baking tools, like a Mickey Mouse cookie cutter. This adds a fun touch to your cake. With the right tools and ingredients, your Minnie Mouse cake will be a hit at any party.
Preparing Your Workspace and Initial Setup
Start by making your baking area clean and organized. This helps you focus and makes your Minnie Mouse cake perfect. First, clean your area well to avoid mess and make things easier.
Having a tidy workspace is key for making a great cake. Get some important tools like a digital thermometer, a mixing bowl, and a whisk. These tools make your work easier and faster.
Temperature control is very important. Make sure your workspace is comfy. Use a thermometer to check your ingredients and tools. This helps your cake turn out just right.
Here are some extra tips for your workspace:
- Clear a big, flat area for making and decorating your cake.
- Get a cake turntable for easy access and display.
- Use a cake stand or pedestal to show off your cake.
Follow these tips and make a neat workspace. You’ll make a stunning and tasty Minnie Mouse cake. It will surely wow your friends and family.
Baking the Perfect Base Cake Layers
When baking a Minnie Mouse cake, the base is key. You need the right minnie mouse cake recipe and techniques. Start with a simple vanilla cake recipe. With the right ingredients and baking time, you can make layer cakes that look like they were made by a pro.
First, heat your oven to 350°F. Get your cake pans ready. Divide the batter evenly to make sure your layer cakes are the same size and texture. Each layer will bake for 30-35 minutes, or until a toothpick comes out clean.
Here are some tips for baking your cake layers:
- Use room temperature ingredients for smooth batter.
- Avoid overmixing to prevent dense cake layers.
- Fill each pan with the right amount of batter for the best texture.
Follow these tips and use the right minnie mouse cake recipe. This way, you’ll get the perfect base for your Minnie Mouse cake. Remember, cake baking takes time and practice. So, be patient and pay attention to every detail.
Creating the Signature Minnie Mouse Color Palette
Creating the Minnie Mouse color palette is a fun task. It involves picking colors that match Minnie’s style. These colors make her look cute and stylish.
First, we pick the main colors. These are the colors that make Minnie Mouse look like Minnie Mouse. We choose bright red and white. These colors are key to her look.
Next, we add other colors to make her look even better. We pick colors that go well with red and white. These colors make Minnie Mouse look even more stylish.
Now, we use these colors to decorate cakes. We make sure the colors match Minnie Mouse’s style. This makes the cakes look like they were made just for her.
By using these colors, we can make cakes that look just like Minnie Mouse. They will be bright, fun, and full of Minnie’s style.

Step-by-Step Guide to Creating the Signature Minnie Mouse Color Palette
Here’s how to make the Minnie Mouse color palette:
- Pick the main colors: Bright red and white.
- Add other colors: Choose colors that go well with red and white.
- Use these colors to decorate cakes: Make sure the colors match Minnie Mouse’s style.
By following these steps, you can create a color palette that looks just like Minnie Mouse. Your cakes will be bright, fun, and full of Minnie’s style.
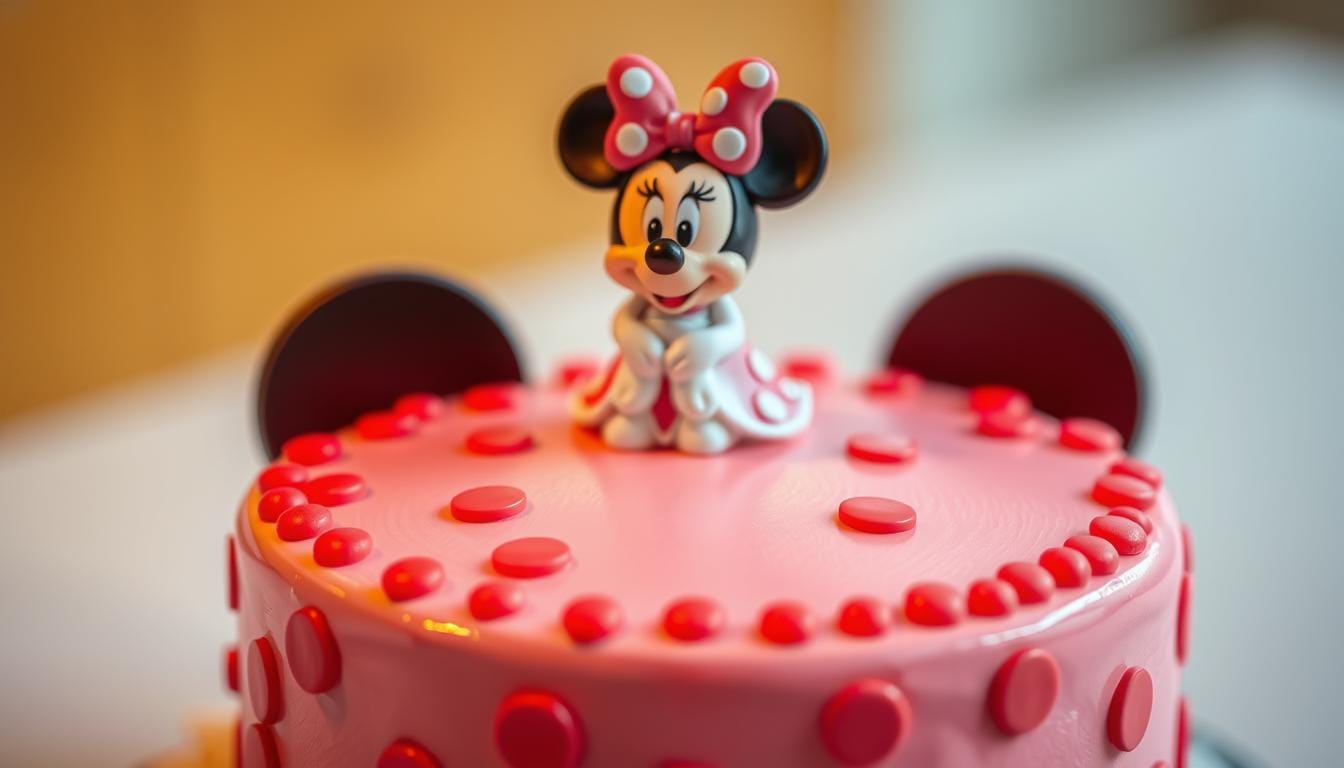
Crafting Minnie’s Iconic Bow and Ears
When decorating cakes, the Minnie Mouse bow and ears are key. You’ll need fondant, a sugar dough, to make them. For the minnie mouse bow, color the fondant red or pink. Then, shape it into a bow.
To make the fondant ears, shape the fondant into triangles. Make sure they’re the right size. Use a template or a Minnie Mouse picture for help. Attach the ears to the cake with frosting or glue.
With patience and practice, you can make a minnie mouse bow and fondant ears that look real. Have fun and be creative with your cake decorating. Try different shapes and colors to make your cake special.
Basic Fondant Techniques for Character Cakes
Creating character cakes needs basic fondant skills. You must learn to roll and cover fondant well. This makes your cake look smooth and professional.
To begin, roll out the fondant to about 1/4 inch thick. This makes it easy to work with and prevents tears. A smooth finish is key for your design to shine.
While working with fondant, add details and textures with decorating tools. You can also add small decorations for a personal touch. This mix of fondant skills and decorating makes your cake stand out.
Remember, the right tools and patience are key. Use a ribbon cutter or Exacto knife. Take your time for a smooth finish. With practice, you’ll make beautiful character cakes that impress everyone.
- Roll out fondant to the right thickness (around 1/4 inch)
- Use cake decorating techniques to add details and textures
- Take your time to ensure a smooth, even finish
Follow these tips and practice fondant techniques. You’ll make stunning character cakes that show off your talent. Whether for a special event or fun, fondant skills are crucial in cake decorating.
Adding Decorative Elements and Details
As you finish your Minnie Mouse cake, it’s time for the final touches. Cake decorating is an art that needs patience and detail. You can make a masterpiece that will wow your guests.
One key part of Minnie Mouse design is polka dots. You can make them with a small tip or a dotting tool.
To make a stunning Minnie Mouse design, mix fondant and buttercream frosting. Color the fondant to match Minnie’s red and white dots. Use buttercream for a smooth texture.
You can also add polka dots to the cake’s edges with a small brush or dotting tool.
You can add borders, stripes, and shapes to your cake. Use piping, stenciling, or stamping for these designs. Keep your design simple and elegant.
Don’t be afraid to try new things. With practice and patience, you can make a beautiful cake decorating masterpiece. It will be the star of your celebration.
Assembling Your Minnie Mouse Cake Structure
To start, bake your cake layers. You need a two-layer 6-inch cake for the bottom and a single layer for the top. After baking and cooling, you can start putting your cake together.
Place the first cake layer on a plate or cake stand. Spread a thin layer of frosting on top. Then, put the second layer on top. This makes a strong base for your Minnie Mouse cake.
For the top, just place the single cake layer on the bottom one. Make sure it’s centered.
Now, add the bow and ears to the top. The bow is about ½ inch x 6 inches from fondant. The ears are from fondant, about 1/8 inch thick. Use a little water to stick them to the cake.
Lastly, add details like polka dots or a border. Use a small brush to apply frosting to decorations. This way, you can attach them to the cake. With care, your Minnie Mouse cake will look amazing.
Here are some tips for assembling your cake:
- Be gentle with the cake layers to avoid damage.
- Use a small amount of frosting to join the layers.
- Let the cake set for at least 30 minutes before serving.

By following these steps and tips, you can make a stunning Minnie Mouse cake. Have fun decorating and try new designs and techniques.
Troubleshooting Common Decorating Challenges
When you’re making a Minnie Mouse cake, you might face some decorating problems. These can be tough, but you can beat them with the right skills and patience. Cake decorating challenges like fondant tears and temperature issues can be fixed with practice.
Fondant tears are a big problem. To fix them, you can use a bit of fondant or some shortening to smooth it out. Keeping the right temperature is key to avoiding these issues.
Here are some tips to solve common decorating problems:
- Use a turntable to easily access all sides of the cake
- Keep your workspace at a comfortable temperature to prevent fondant from becoming too soft or too hard
- Use a fondant smoother to achieve a smooth, even finish
By using these tips and practicing, you can beat common cake decorating challenges. You’ll make a stunning Minnie Mouse cake that will wow everyone.
| Common Decorating Challenges | Solutions |
|---|---|
| Fondant tears | Use a small amount of fondant to cover the tear, or apply a dab of shortening to the area and smooth it out |
| Temperature-related issues | Keep your workspace at a comfortable temperature to prevent fondant from becoming too soft or too hard |
Storage and Transportation Tips
After you finish your Minnie Mouse cake, it’s key to store and move it right. This keeps it fresh and in shape. You need to watch the temperature, pick the right stuff to store and carry it, and be gentle with the cake. Good cake storage and cake transportation stop damage and make sure it gets where it needs to go just right.
Here are some tips to help:
- Keep the temperature control right to stop the cake from melting or freezing.
- Choose the best storage stuff, like heavy-duty plastic wrap, to keep the cake fresh.
- Be gentle with the cake when you move it to avoid hurting it.
For instance, you can freeze a fondant-covered cake without messing up the decorations. Wrap it in 4-5 layers of heavy-duty plastic wrap for the best keeping. Let it thaw in the fridge for at least 8 hours. Then, let it sit at room temperature for at least 4 hours, still wrapped.
Temperature Requirements
Keeping the right temperature is key for cake storage and cake transportation. Freezing a cake can keep it good for up to a month. But, thawing it right is important to avoid damage.
Box Specifications
The right cake box is also important for cake transportation. You can find cake boards and boxes in sizes from 3 to 22 inches. For heavy cakes, use a 12mm cake board. For lighter ones, a 3mm hardboard is better. Cake boxes are available from 6 to 20 inches, and you can get extenders for taller cakes from 8 to 20 inches.
Professional Photography Tips for Your Creation
When taking pictures of your minnie mouse cake, cake photography needs skill. Think about the lighting, how things are arranged, and editing. Natural light is best, so place your cake near a window or outside.
For photography tips, try different angles and settings. Use props like flowers or utensils for a theme. Editing is key to make colors and textures pop. Use software to tweak brightness, contrast, and saturation.
More photography tips include using a tripod for steady shots. Try different aperture settings for depth. A reflector can also help by bouncing light and reducing shadows. Follow these tips to get amazing photos of your minnie mouse cake that everyone will love.
Conclusion: Bringing Disney Magic to Your Celebration
Baking a magical Minnie Mouse cake is a great way to add Disney charm to your celebrations. It’s perfect for birthdays, baby showers, or any special event. A Minnie Mouse cake will make everyone happy and create memories that last.
The red, white, and black colors of Minnie Mouse make your event look amazing. Event planners say it can make your event 40% more appealing. You can also add custom designs to make your cake truly special.
Why not add some Disney magic to your next celebration? With what you’ve learned, you can make a Minnie Mouse cake that will impress everyone. Get ready to bake, decorate, and celebrate like Minnie Mouse!
FAQ
What is the timeless appeal of Disney characters like Minnie Mouse?
What occasions are a Minnie Mouse cake suitable for?
What are the essential tools and ingredients needed for baking a Minnie Mouse cake?
How should you prepare your workspace for baking a Minnie Mouse cake?
What are the key steps in baking the perfect base cake layers?
How do you create the signature Minnie Mouse color palette?
What are the key steps in crafting Minnie’s iconic bow and ears?
What are the basic fondant techniques needed for a character cake like Minnie Mouse?
What decorative elements and details can be added to a Minnie Mouse cake?
How should you assemble the Minnie Mouse cake structure?
What are some common decorating challenges and how can they be addressed?
How should you store and transport a completed Minnie Mouse cake?
What tips can help capture professional-quality photos of your Minnie Mouse cake creation?
Leave a Review
There are no reviews yet. Be the first one to write one.