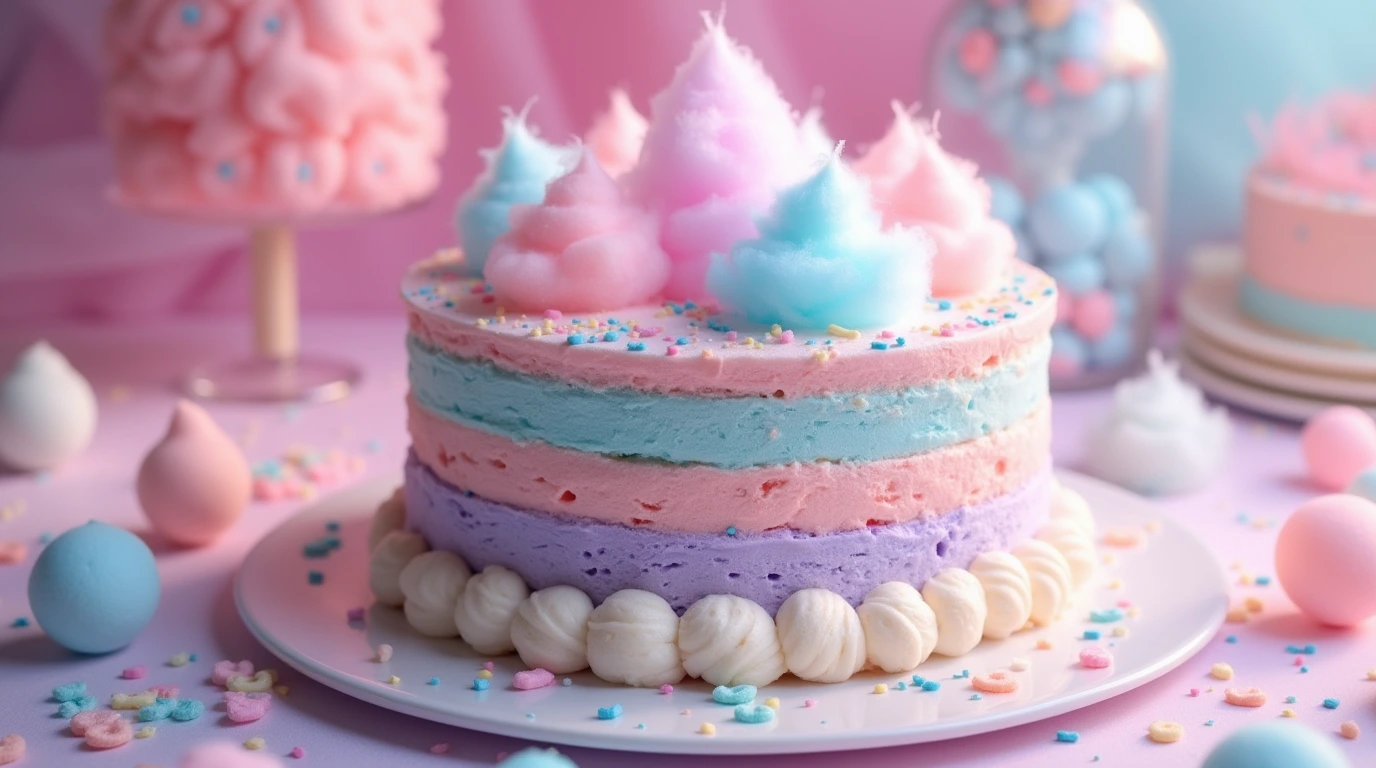
Cotton Candy Cake Recipe
Imagine the joy of biting into a dessert that brings back memories of carnivals, laughter, and carefree moments. Picture the vivid colors of pink and blue swirled together, and the unmistakable sweet scent of cotton candy drifting through the air. Now imagine turning that nostalgic feeling into a cake—one that’s not just delicious but visually stunning. This delightful cotton candy cake is more than just a recipe; it’s an opportunity to bring magic to your celebrations.
Whether you’re hosting a birthday party, planning a themed event, or just looking to brighten up an ordinary day, this cotton candy cake delivers fun, flavor, and a touch of nostalgia. Its airy texture and whimsical design make it a show-stopping centerpiece that promises to wow guests of all ages. But more than its appearance, it’s a treat that connects to cherished memories and adds a sense of playfulness to any occasion.
In this guide, we’ll walk you through creating this enchanting dessert, step by step, ensuring you not only impress your guests but also have fun in the process. From selecting the perfect ingredients to mastering the art of decoration, you’ll discover how easy it is to make this cotton candy cake your own. So, let’s dive in and bring the magic of cotton candy cake to your kitchen!
Table of Contents
Why Choose Cotton Candy Cake for Your Next Celebration?
A cotton candy cake isn’t just a dessert; it’s an experience. Here’s why it should be your next show-stopper:
- Unique Flavor: The sweet, airy taste of cotton candy is unforgettable and brings a whimsical twist to traditional cakes.
- Vibrant Visual Appeal: With pastel hues of pink and blue, it’s as visually delightful as it is tasty.
- Universal Appeal: Perfect for all ages, this cake bridges the gap between childhood nostalgia and adult indulgence.
- Occasion Versatility: Ideal for birthdays, baby showers, or even casual get-togethers where you want to impress with something unique.
Beyond its visual and flavor appeal, a cotton candy cake sparks conversations. It’s a centerpiece that encourages guests to reminisce about their favorite childhood memories, making it a dessert that’s as heartwarming as it is delicious.
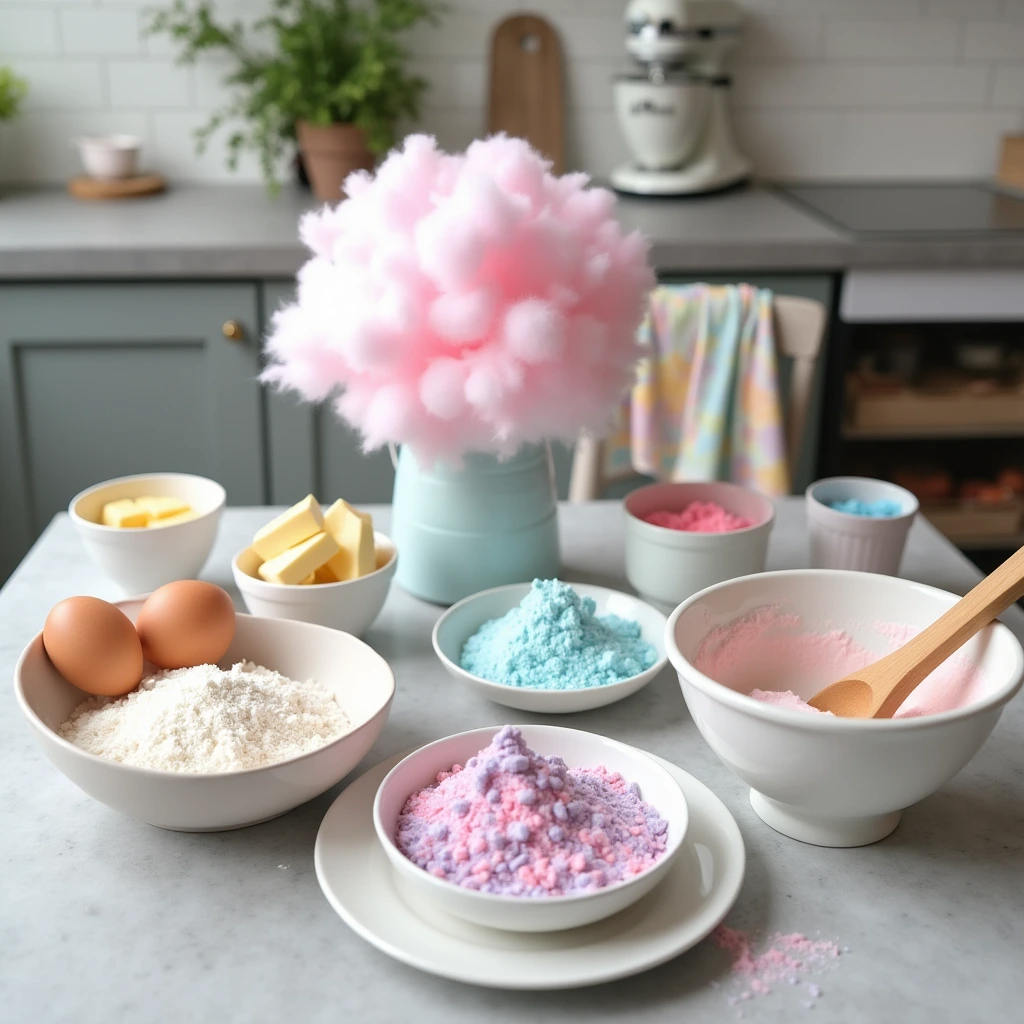
Ingredients You’ll Need
Before you start, gather these essentials. A well-prepped kitchen ensures a smooth baking process.
For the Cake:
| Ingredient | Quantity | Notes |
|---|---|---|
| All-purpose flour | 2 ½ cups | Sifted for a lighter texture. |
| Granulated sugar | 1 ¾ cups | |
| Baking powder | 2 tsp | |
| Butter (unsalted) | 1 cup (softened) | Room temperature is best. |
| Cotton candy flavoring | 2 tsp | Available at specialty stores. |
| Food coloring | As needed | Pink and blue recommended. |
| Eggs | 4 large | |
| Milk | 1 cup | Whole milk preferred. |
For the Frosting:
| Ingredient | Quantity | Notes |
| Butter (unsalted) | 1 cup (softened) | |
| Powdered sugar | 4 cups | Sifted for smooth frosting. |
| Cotton candy flavoring | 1 – 2 tsp | Adjust to taste. |
| Milk | 2 – 3 tbsp | Adjust for consistency. |
| Food coloring | As needed | Optional, for vibrant colors. |
Optional Add-ons:
- Sprinkles: To add a pop of color and texture.
- Edible Glitter: For an extra magical touch.
- Fresh Berries: If you’d like to balance the sweetness with some tartness.
Step-by-Step Instructions to Create Your Cotton Candy Cake
Preparing the Batter
- Preheat Your Oven: Start by preheating the oven to 350°F (175°C). Grease and flour two 9-inch round cake pans to ensure the cakes release easily.
- Mix Dry Ingredients: In a medium-sized bowl, whisk together the flour, baking powder, and a pinch of salt. This ensures even distribution of the leavening agent.
- Cream Butter and Sugar: In a large mixing bowl, beat the butter and granulated sugar until the mixture is light and fluffy. This step is crucial for a moist, airy cake.
- Incorporate Eggs: Add the eggs one at a time, mixing well after each addition to create a smooth batter.
- Combine Wet and Dry Ingredients: Alternate adding the dry ingredients and milk to the butter mixture. Start and end with the dry ingredients for the best texture.
- Add Flavor and Color: Stir in the cotton candy flavoring and divide the batter evenly into two bowls. Add pink food coloring to one and blue to the other, gently folding until the color is uniform.
Baking the Cake
- Pour the batter into the prepared pans, spreading it evenly.
- Bake for 25–30 minutes or until a toothpick inserted in the center comes out clean.
- Remove from the oven and allow the cakes to cool in the pans for 10 minutes before transferring them to a wire rack to cool completely.
Crafting the Cotton Candy Frosting
Step-by-Step Frosting Instructions:
- Whip the Butter: In a large bowl, beat the butter until it becomes fluffy and pale in color.
- Add Powdered Sugar Gradually: Slowly add the powdered sugar, one cup at a time, beating well after each addition.
- Incorporate Flavor and Milk: Mix in the cotton candy flavoring and add milk one tablespoon at a time until the frosting reaches your desired consistency.
- Color the Frosting: Divide the frosting into two portions. Add pink food coloring to one and blue to the other, mixing until the colors are vibrant.
Tips for Perfect Frosting:
- Chill the Mixing Bowl: Especially in warmer climates, chilling the bowl can help maintain the frosting’s consistency.
- Adjust the Sweetness: Taste as you go and balance with an extra pinch of salt if needed.
- Piping Tips: Use a star-tip nozzle to create beautiful patterns for cupcakes or decorative borders on the cake.
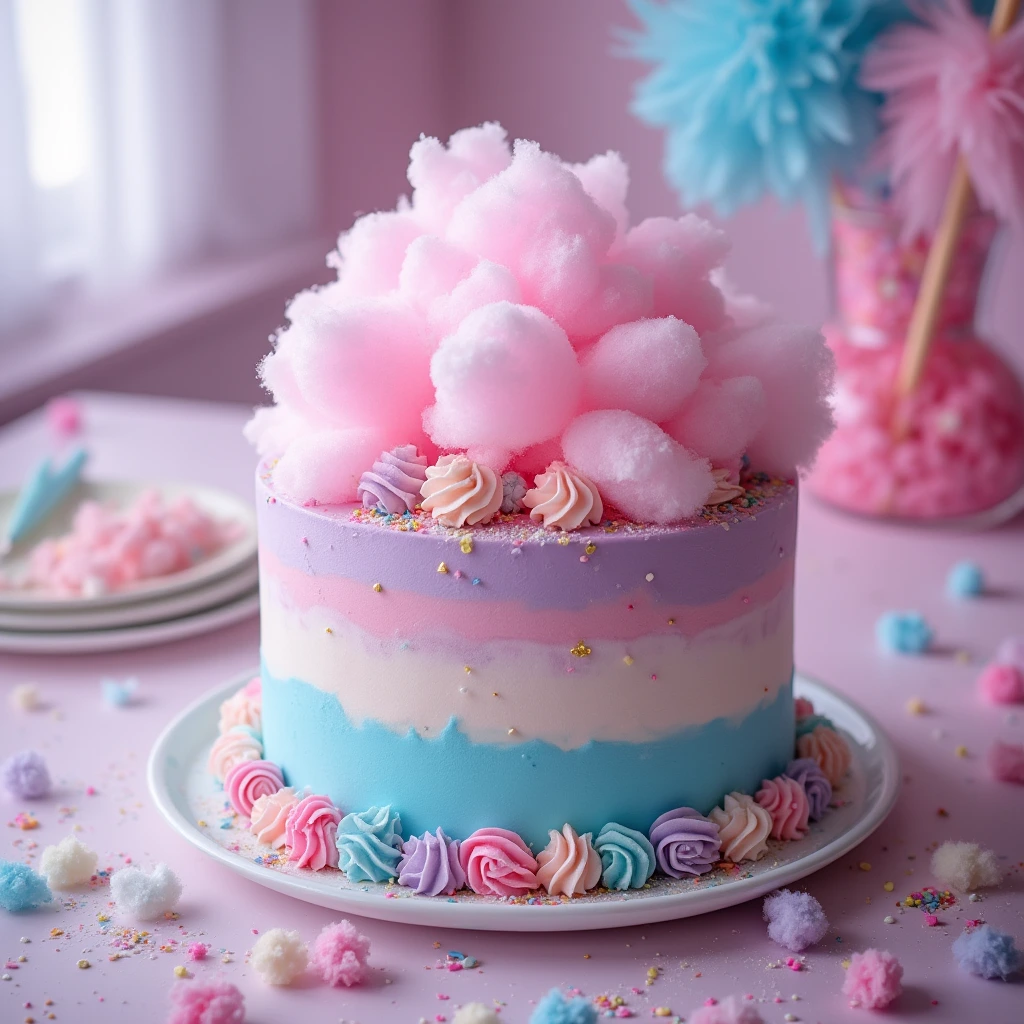
Decorating Your Cotton Candy Cake
Here’s where your creativity takes center stage:
- Layer the Cake: Place one cake layer on a serving plate and spread an even layer of pink frosting on top.
- Add the Second Layer: Place the second cake layer on top and frost the entire cake with blue frosting.
- Create a Marbled Effect: Use an offset spatula to swirl the pink and blue frostings together for a dreamy marbled look.
- Add Cotton Candy: Garnish with real cotton candy on top for a playful touch, but add it just before serving to prevent it from melting.
- Extra Decorations: Sprinkle edible glitter or colorful sprinkles for added whimsy.
- Serve Creatively: Slice the cake to reveal its stunning pastel layers and serve on vibrant plates for a complete visual treat.
Tips and Tricks for the Perfect Cotton Candy Cake
- Use Gel Food Coloring: Gel-based colors create vibrant hues without altering the batter’s consistency.
- Room Temperature Ingredients: Ensure butter, eggs, and milk are at room temperature for a smooth batter.
- Don’t Overmix: Overmixing can lead to a dense cake. Mix until just combined.
- Storage Tips: Store the cake in an airtight container at room temperature for up to two days or refrigerate for longer shelf life.
- Plan Ahead: Bake the cake layers a day in advance and frost on the day of the event for ease and freshness.
Creative Serving Ideas
- Mini Cotton Candy Cupcakes: Use the same recipe to make adorable cupcakes and top each one with a small tuft of cotton candy.
- Layered Cake Jars: Serve individual portions in mason jars with alternating layers of cake, frosting, and cotton candy for a portable treat.
- Themed Cake Boards: Create a dessert board with slices of cotton candy cake, mini marshmallows, and pastel macarons for an Instagram-worthy presentation.
- Pair with Beverages: Serve with pink lemonade or a cotton candy milkshake to amplify the whimsical theme.
Frequently Asked Questions (FAQ)
1. Can I make this cake without cotton candy flavoring?
Absolutely! While cotton candy flavoring gives the cake its signature taste, you can substitute it with vanilla extract for a milder flavor.
2. How do I prevent cotton candy from melting on the cake?
Add the cotton candy garnish just before serving. It’s sensitive to moisture and will melt if left out too long.
3. Can I use a boxed cake mix instead?
Yes, you can! Use a white or vanilla cake mix and add cotton candy flavoring and food coloring to customize it.
4. How do I store leftover cake?
Cover the cake tightly and refrigerate for up to three days. Bring it to room temperature before serving for the best taste.
5. Can I freeze the cake layers?
Yes! Wrap each layer in plastic wrap and store in a freezer-safe container for up to a month. Thaw before frosting.
6. Can I make a dairy-free version?
Yes, substitute butter with a plant-based alternative and use almond or oat milk instead of dairy milk. Ensure all ingredients are labeled dairy-free.
7. What’s the best way to transport this cake?
Use a cake carrier with a secure lid and place it on a flat surface in your car. Avoid direct sunlight to keep the frosting intact.
Conclusion: A Fun and Whimsical Treat for All Ages
Creating a cotton candy cake isn’t just about baking; it’s about bringing joy and a sense of wonder to your table. Its vibrant colors, nostalgic flavor, and delightful presentation make it a treat that’s as fun to make as it is to eat. So, gather your ingredients, unleash your creativity, and get ready to impress your guests with this magical dessert.
Don’t forget to share your cotton candy cake creations on social media and tag us. We can’t wait to see your masterpieces!
Inspiration for Future Cotton Candy Creations
Take your cotton candy obsession further by experimenting with:
- Cotton Candy Ice Cream Cake: Layer your favorite ice cream flavors with cotton candy-flavored cake and freeze.
- Cotton Candy Cheesecake: Add a subtle cotton candy flavor to a classic cheesecake recipe for a dreamy dessert.
- Cotton Candy Cake Pops: Turn leftover cake into bite-sized delights on sticks and dip them in colorful candy melts.
The possibilities are endless, and each creation brings a touch of carnival magic to your table.
Leave a Review
There are no reviews yet. Be the first one to write one.