Bake a Barbie Cake: The Perfect Party Treat
Table of Contents
Creating a Barbie cake is a great way to wow your guests at any celebration. It combines the charm of Barbie with a tasty dessert. You can pick from many Barbie cake ideas: a themed cake, like using a ballerina Barbie, which costs $5 – $10. With the right tools and ingredients, your cake will be a hit.
Making a Barbie cake is simpler than you might think. You don’t need special pans to make it. Start with 4-6 cupcakes for the base. Then, decorate it with your favorite frosting, which might need to be doubled or tripled to cover the whole cake.
The author has made many Barbie cakes and found it takes about 1.5 hours to decorate one. They used a star tip frosting method for a beautiful design.
Key Takeaways
- You can create a unique barbie in the cake using various barbie cake ideas and doll cake design techniques.
- No special Barbie cake pans are required to make a Barbie cake.
- Using a crumb coat and frosting recipe, such as the one that may need to be made 2 and a half times, can help keep crumbs out of the final frosting.
- A Barbie doll is essential for the cake’s central design, and you can choose from various styles, such as a ballerina Barbie.
- With the right tools and ingredients, including bundt pans, pyrex bowls, and cupcake pans, you can create a stunning Barbie cake.
- The cake preparation involves specific steps, such as making round cakes, cutting holes in the layers, trimming the cakes, and assembling them, and can be baked at 325°F with specific baking times for different layers.
Understanding the Magic of Barbie in the Cake
Barbie cakes have been a hit at parties since 1959. The iconic doll, Barbara Millicent Roberts, has inspired over 200 career-themed dolls. This makes her a great choice for themed parties.
History of Doll Cakes
Doll-shaped cakes started becoming popular in the late 20th century. Barbie quickly became a top pick for these cakes. They celebrate both the birthday and the beloved doll.
Why Barbie Cakes Are Party Favorites
Barbie theme parties often feature a cake shaped like the doll. These cakes are loved at all kinds of events, from kids’ birthdays to weddings. Each cake can be customized to match the event’s style.
Modern Interpretations and Trends
Today, Barbie cakes come with modern designs and themes. You can find cakes with princess, unicorn, or fashionista themes. New baking techniques allow for detailed dresses and accessories, making the cakes even more stunning.
| Statistic | Details |
|---|---|
| Average Baking Time | 35 minutes for an 8-inch round cake |
| Baking Temperature | 350°F |
| Number of Layers | Typically 2-3 layers |
| Box Mix Usage | 60% of bakers use box mix for Barbie cakes |
| Cooling Time | At least 30 minutes after baking |
Essential Tools and Ingredients for Your Barbie Cake
To make stunning Barbie cake decorations, you need the right tools and ingredients. Here’s what you’ll need to bring your creative cake designs to life.
Tools:
- Dress Mold Pan: Shapes the iconic Barbie dress on your cake.
- Piping Bags and Various Tips: Essential for intricate frosting designs.
- Turntable: Facilitates smooth frosting application.
- Cake Drum or Plate: Provides stability while decorating.
Ingredients:
- Cake Mix: Choose your preferred flavor, such as vanilla or strawberry.
- Eggs, Water, and Oil: Combine to create a moist cake batter.
- Food Coloring: Adds vibrant hues to your creative cake designs.
- Frosting: Use enough for both ombre effects and piping embellishments.
Having these tools and ingredients ensures a smooth and enjoyable cake-making process. Adjust cake pans to fit different Barbie sizes. Practice piping techniques on wax paper before applying designs directly to the cake.
With the right setup, your edible Barbie cake decorations will become the centerpiece of any party.
Preparing Your Doll for Cake Installation
Getting your Barbie ready for the cake is key to a perfect doll cake design. It makes sure your creation is both safe and looks great.
Cleaning and Sanitizing the Doll
Start by cleaning your Barbie doll well. Use mild soap and warm water to get rid of dirt or residue. Then, sanitize the doll with a food-safe wipe to make it safe for cake.
Wrapping Techniques for Food Safety
Wrap Barbie’s hair and legs in plastic wrap to protect them. This keeps frosting off and keeps the doll clean. Make sure everything is wrapped tightly to keep it safe.
Choosing the Right Barbie Style
Pick a Barbie that fits your doll cake design. Whether it’s a classic or modern look, the right Barbie makes your cake look better. It also makes sure the doll fits well in the cake.
Baking the Perfect Cake Base
Creating a stunning Barbie cake starts with a solid foundation. Using a reliable cake mix simplifies the process. This lets you focus on the creative aspects of your cake design.

For creative cake designs, consider using a combination of baking pans. A 9-inch bundt pan, two 6-inch round pans, and a cupcake pan can help shape Barbie’s iconic dress. This variety ensures your cake base is both sturdy and visually appealing.
Prepare your batter according to the package instructions, ensuring it has the right consistency. Pour the batter evenly into each pan. Use a pastry brush with melted butter or shortening to coat the pans for easy removal.
- Bake the 6-inch cakes at 350°F for 25-30 minutes until golden around the edges.
- Bake the bundt cake slightly longer, usually around 35-40 minutes.
Allow the cakes to cool in their pans for 10-15 minutes before transferring them to a wire rack to cool completely. Level the bundt cake’s bottom with a serrated knife to create a stable base.
By following these steps, you’ll achieve the perfect cake base. It supports your Barbie doll and decorations, setting the stage for endless Barbie cake ideas.
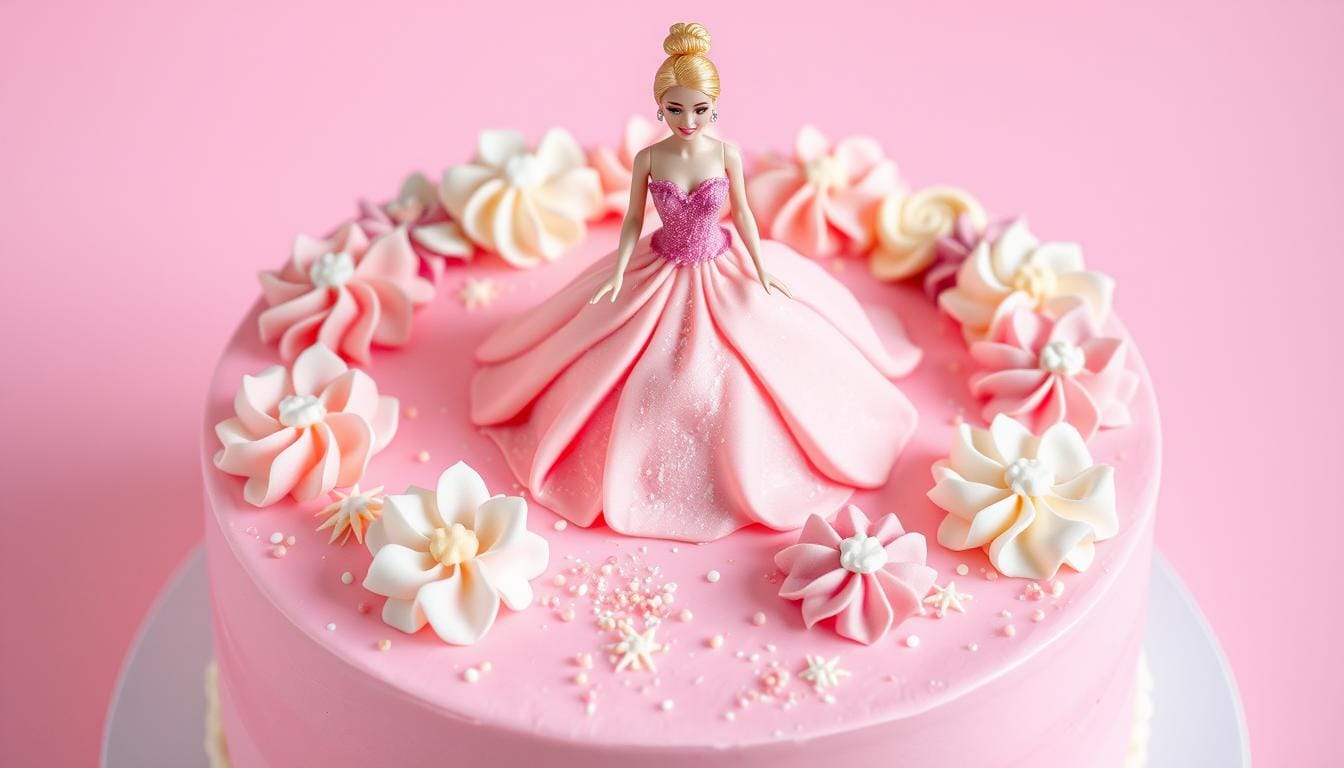
Creating the Iconic Dress Shape
Turning your cake into Barbie’s dress is a key step in doll cake design. First, make sure your cake base is perfectly shaped. This supports your creative cake designs.
Carving Techniques
Start by cutting a hole in the center of the cake with a sharp knife. The hole should fit Barbie’s legs snugly. This ensures your doll sits securely, showing off your design’s details.
Layering Methods
To add volume, layer more cake pieces around the base. This makes your cake look better and provides a strong base. Make sure each layer is even to keep things symmetrical.
Structure Support Tips
Freeze the cake for 3-6 hours before decorating. This step reduces crumbs and keeps the shape during decorating. Using edible supports or dowels also helps keep your cake stable.
Use buttercream icing in three shades for an ombre effect. Pipe two rows of flowers and add sugar pearls or glitter for a beautiful finish. Proper layering and support make your Barbie cake both beautiful and durable.
Mastering the Frosting Application
Start with a crumb coat to keep crumbs in. This makes a smooth base for your edible Barbie cake decorations. Spread a thin layer all over the cake.
After the crumb coat, chill the cake for about an hour. This makes the frosting firm. It’s easier to add details then.
For Barbie’s dress, you might need different frosting textures. Use thick frosting for solid parts and thin for patterns.
Here are key cake decorating tips for frosting:
- Use a bench scraper for smooth, straight sides.
- Keep pressure even to avoid streaks.
- Keep tools cold to stop frosting from melting.
Frosting handling changes with the weather. In warm places, chill the cake before decorating. In cool areas, work in the shade to keep frosting right.
| Frosting Type | Consistency | Best Uses |
|---|---|---|
| Crumb Coat | Thin | Sealing in crumbs |
| Buttercream | Medium | Main frosting layer |
| Royal Icing | Thick | Fine details and decorations |
Decorative Elements and Design Options
Turn your Barbie cake into a stunning centerpiece with creative designs and thoughtful decorations. Pick the right color scheme to make your cake stand out and match the Barbie theme.
Color Schemes and Themes
Go for vibrant colors that match the Barbie doll. Try an ombre effect by lightening the frosting color from top to bottom. This adds depth and interest to your cake. Soft pinks, bright fuchsias, and shimmering silvers are great choices.
Piping Techniques
Use piping techniques to enhance your cake. Make elegant rosettes with a star tip (1M) on a piping bag. Try different patterns and layers for a sophisticated look that shows off your decorating skills.
Edible Embellishments
Add the final touches with edible decorations like fondant flowers, edible glitter, or personalized toppers. These details make your cake look amazing and make it uniquely yours. Choose elements that fit the party theme and the birthday girl’s personality.
Advanced Design Techniques for Stunning Details
Take your barbie cake ideas to the next level with advanced decorating. Add elegance and sophistication with intricate lace and 3D elements. Your cake will become a true masterpiece.
Try the “tutu” effect with a petal tip (104) for a layered look. Move the tip up and down quickly while rotating the cake. This creates delicate ruffles, giving your cake a graceful feel.

Make your creative cake designs stand out with fondant and buttercream textures. Add a personal touch by reflecting the recipient’s interests or the party theme. This makes each cake unique and special.
- Use multiple shades of ombre buttercream for a striking look.
- Add 3D fondant roses for depth and dimension.
- Apply delicate piping for detailed lace patterns.
- Use edible embellishments like pearls or glitter dust for sparkle.
Here are some key cake decorating tips for mastering these techniques:
| Technique | Description | Tools Needed |
|---|---|---|
| Tutu Effect | Create layered ruffles using a petal tip and rotational motions. | Petal tip (104), rotating stand, buttercream frosting. |
| Intricate Lace | Piping detailed lace patterns for an elegant finish. | Piping bags, fine-tipped nozzle (1M). |
| 3D Embellishments | Add depth with fondant roses and other shapes. | Fondant, silicone molds, shaping tools. |
| Ombre Buttercream | Use varying shades of purple for a gradient effect. | Buttercream frosting, gel colors, multiple bowls. |
| Edible Embellishments | Incorporate pearls, glitter, or sugar dragees for added flair. | Edible decorations, fine brushes. |
Storage and Transportation Guidelines
Keeping your Barbie cake in top shape is key. Follow these steps to ensure it stays fresh and beautiful until the big day.
Temperature Considerations
Put your frosted Barbie cake in a cake box and chill it in the fridge at 5°C. This keeps the cake’s structure and freshness intact. If you cut the cake, cover the parts with plastic wrap to stop them from drying out.
Boxing and Moving Tips
Use a strong cake box or a tall layer cake carrier to move your Barbie cake safely. For big cakes, go for two or three-tier boxes for stability. For cupcakes, collapsible or plastic carriers are best to keep them in place. Always handle the box carefully to avoid damaging your cake.
Common Challenges and Solutions
Making a beautiful barbie in the cake can face some hurdles. Knowing these problems and how to fix them will help your cake look amazing.
Cake Collapsing: This issue arises when cake layers aren’t supported well. To avoid it, freeze your cake layers for at least two hours before stacking. Also, using a strong base like a dowel can add stability.
Icing Not Being Smooth: Getting a perfect finish needs the right frosting. Use cold frosting in piping bags with 1M tips for better control. Before the final layer, apply a crumb coat with about 4 cups of frosting to smooth the surface.
Barbie Not Fitting Properly: To make sure your Barbie doll fits right, pick the right doll size and shape the cake. A 6.5-inch Barbie works well with cake layers cut into 9″, 7″, and 6″ rounds. Also, disposable food-grade gloves can keep the doll’s legs clean while decorating.
| Challenge | Solution |
|---|---|
| Cake Collapsing | Freeze cake layers before stacking and use dowels for support. |
| Icing Not Smooth | Use chilled frosting and apply a crumb coat. |
| Barbie Not Fitting | Choose the right doll size and shape the cake layers accordingly. |
Theme Variations and Special Occasions
Make your Barbie theme party special with versatile cake designs. These designs fit any celebration, from princess parties to festive holidays. You can also choose unique color schemes to make your event unforgettable.
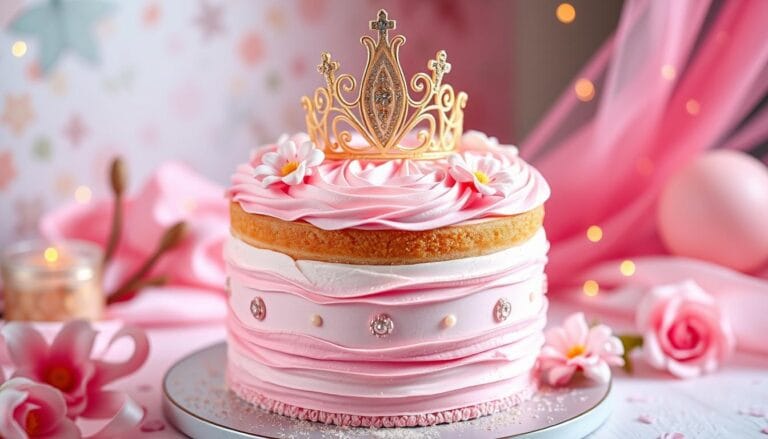
Princess Themes
Bring a fairytale vibe with princess-themed barbie cakes. Use pastel colors, tiaras, and elegant decorations. This will match the magical setting of your party.
Holiday Adaptations
Change your Barbie cake for different holidays. For Christmas, add red and green decorations. For Halloween, use black frosting and spooky toppers. These creative cake designs bring a festive feel to your celebration.
Custom Color Combinations
Match your cake to your party’s colors with custom designs. Choose bright and bold or soft and subtle. Tailored Barbie cake ideas make sure your cake fits the overall look perfectly.
| Cake Size | Serves | Price |
|---|---|---|
| 6″ | Up to 12 people | From $78.00 |
| 8″ | Up to 20 people | From $78.00 |
| 10″ | Up to 30 people | From $78.00 |
Conclusion
Making a birthday cake with a doll, like Barbie, makes any party magical. You now know how to create a Barbie cake that will wow your guests.
Choosing the right tools and ingredients is key. Mastering frosting techniques is crucial. Each step gets you closer to a perfect cake. The joy and creativity in making your own cake make it fun and rewarding.
A Barbie-themed cake is perfect for any celebration. It becomes a memorable part of the party. By following the tips, you can overcome challenges and make a cake everyone will love.
Don’t be afraid to try new colors, decorations, and designs. Sharing your creations can inspire others to bake. Enjoy the fun and satisfaction of making a unique Barbie cake for your next celebration.